Clone Stamp Tool - Copy and Paste Parts of Image Online Free
Interactive • Private • No Registration • No AI • No Restrictions
Works as Clone Stamp and Healing Brush tool in Photoshop
Free online Clone Stamp Tool to copy and paste any part of an image online in your browser. No AI, no watermark, no limits. Manually adjust size, hardness, and opacity. Use UNIQUE features to flip and rotate copied areas before you paste them.
Clone Brush basically lets you copy and paste parts of the image. Click Select sample point button, click or tap on an area you want to copy, then click or tap where you want to apply the copied part. A live preview of the sampled area appears inside the brush circle as you move your cursor, so you always know exactly what will be painted before you click.
How to use the Clone Tool
- Upload your image.
- Click Select sample point and click the area you want to copy - a yellow crosshair marks the sample location.
- Move your cursor over the image — the brush circle shows a live preview of the sampled area.
- Click or drag to paint the copied area onto the image.
- Adjust Brush Size to cover more or less area, Hardness to control edge softness, and Opacity to blend subtly or fully.
- If you are not happy with the result, no worries - click Undo and try again as many times as you need. Everything is FREE, unlimited, and your image downloads in full original resolution
- Download the result as a PNG in the original resolution.
Controls explained
- Brush Size - controls how large an area is copied and painted. Scales automatically based on your image size so it works on both small and large photos.
- Hardness - at 100% the brush edge is sharp like a hard stamp. At 0% the edge fades out softly so the copied area blends naturally into the surroundings. Use low hardness for skin retouching and high hardness for precise object cloning.
- Opacity - at 100% the copied pixels fully replace the destination. Lower values blend the copy subtly, useful for gradually building up texture or softening a result over multiple strokes.
- Live preview circle - after setting a sample point, your brush circle shows exactly what pixels will be painted as you hover, so there are no surprises when you click.
- Undo (Ctrl+Z) - steps back up to 20 strokes so you can experiment freely without fear of ruining your image.
- Zoom - zoom in for precise work on fine details like skin, text edges, or small objects.
What you can do with the Clone Tool
- Extend edges of objects - sample the edge of an object and paint it where you want the edge to continue.
- Add more items to a photo - copy an object and paste it elsewhere. For example, copy a cloud and add more clouds to the sky.
- Move objects from one place to another.
- Remove larger areas by replacing them with nearby textures.
- Remove text or watermarks by cloning surrounding pixels over them.
- Soften smile lines or wrinkles - sample nearby smooth skin and paint over lines with low opacity for a natural result.
- Clean messy backgrounds - sample a clean wall or floor and paint over wires, trash, or distractions.
- Remove photobombers - replace a person in the background with nearby scenery.
- Smooth wrinkled clothing - sample flat fabric and paint over wrinkles.
- Blend textures gradually - use low opacity and soft hardness to build up texture naturally over multiple strokes.
The changes appear immediately with no loading time. This tool is not AI - it does not regenerate images or guess pixels. Your photos are not uploaded to any server and are not analyzed. Everything runs locally in your browser, so your images stay completely private. No registration required. For more information, read our Privacy Policy and Terms of Use. Have a question or suggestion? Contact us
Clone Tool Examples and Demos – Copy and Paste Parts of an Image
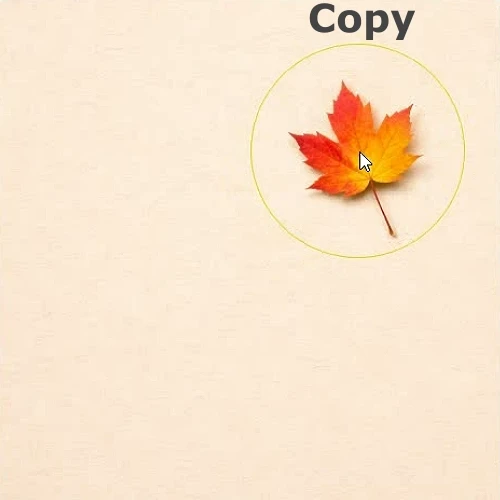
Copy and Paste Rotated and Flipped Objects
In this screen recording, you can see how to copy a leaf and place it multiple times across the image.
You can paste it in the same position, or flip and rotate it before placing for a more natural result. As you move the cursor, the copied area appears inside a preview circle so you can see exactly how it will look before placing. If you are not happy with the result, click Undo and try again.
How to copy and paste objects in an image
- Upload your image.
- Click "Select sample point" and click the area you want to copy.
- Move your cursor - the copied area shows inside a circle preview.
- Rotate or flip the sample using the sliders and buttons if needed.
- Click "Stamp" to paste. You can stamp multiple times with different rotation and flip settings.
- Select a new sample point to copy a different area.
- Download the result in the original resolution and quality.

Make a Person Look Slimmer by Adjusting Body Shape
In this screen recording, you can see how the left side of the body is selected with the lasso tool and moved slightly inward toward the center. The same is done on the right side. The result is a slimmer looking person with no visible edge or cut. The Hardness slider lets you soften the edges of the selected area so it flawlessly dissolves into its new place.
This is where the circular brush cannot select an elongated shape, so lasso tool is the better choice.
Step-by-Step: How to Slim a Body in Photos Without Blurring
- Upload your image.
- Switch to Lasso mode using the mode toggle.
- Draw a lasso selection around one side of the body or object - select part of both background and the edge of the body so that when you relocate it, the selected part of the background will cover the edge of the body.
- Drag the selected area slightly inward toward the center of the body.
- Adjust the Hardness slider - lower hardness makes the edge fade softly into the new area for a natural invisible blend. Higher hardness gives a sharper edge which would be very visible in this case.
- Click Stamp or press "Enter" to confirm the placement.
- Repeat on the other side.
- Download the result in the original resolution and quality.
The same slimming effect can also be achieved with our Liquify Warp Tool by pushing the edges inward with the brush, but it slightly blurs the moved area. If you need the subject to stay sharp and crisp, use this Clone Tool.
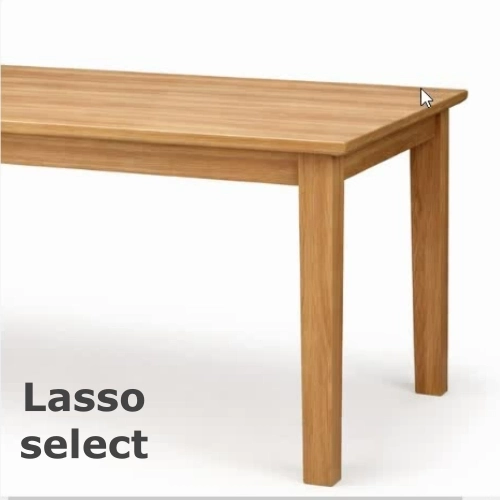
Extend, Expand and Reshape Objects with the Clone Tool
In this screen recording, the table is extended beyond its original size using the Lasso select in our Clone Tool - simply by copying and pasting parts of the image. The table stretches to the right edge, making it appear longer, with no visible cuts or distortions.
What You Can Do with the Clone Tool
- Extend edges and objects - horizons, hair, sleeves, tables, roads, buildings, fences. If you can imagine it, you can extend it.
- Enlarge objects - move their edges outward to make them bigger.
- Shorten or shrink objects — copy surrounding area and paste it over the edge of the object. Shorten tall people, trim trees, narrow buildings - anything is possible.
- Duplicate and multiply elements - turn one object into many. From one stack of money you can make dozens.
- Fill empty areas — expand backgrounds to fill gaps or cover unwanted parts of the image.
- Repair imperfections - fix scratches, gaps, torn edges, or missing parts of an image.
- Replace or cover objects - paste texture or background over something you want to remove or hide.
- Create patterns and repetition - tile textures, repeat architectural elements, or multiply decorative details.
Download your edited image in the original size and quality. Since nothing is uploaded to our servers, your images stay completely private. Experiment and see what you can create with this tool - the possibilities are countless. If you want to share what you made or send us feedback, contact us.

Remove Photobomber from Photo
In this screen recording, you can see how to remove a photobomber from a couple's photo. We use the Lasso Selection and our Clone Tool to create the background using existing elements from the image.
How to Remove Photobombers Manually Without AI
- Lasso Selection: Use the Lasso tool to select a custom-shaped area.
- Soft Edges (Feathering): By using a soft edge on your selection, the copied area blends smoothly when pasted without leaving visible edges between old and new areas. Just reduce the Edge Hardness slider to 50% or less.
- Avoid Patterns: To prevent the background from looking repetitive, rotate and flip the cloned parts. This creates a natural, random texture that mimics real nature.
- Color Matching: Sample from different areas - like the differently colored trees on the right for variety.
Note: This manual method takes a little more time and practice than regenerating it with unpredictable AI, but the reward is worth it: no one has seen your photo, you control everything, and there is a real sense of pride in knowing you created the perfect edit yourself.
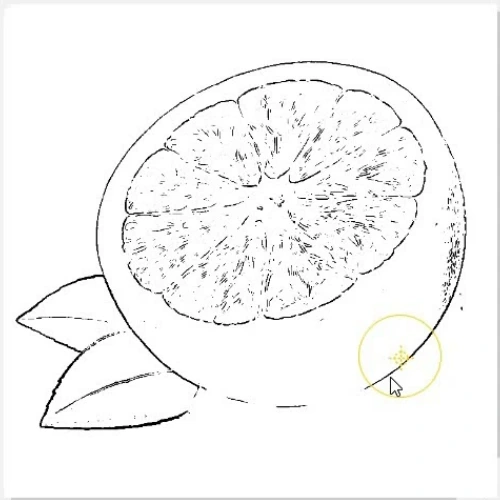
Add Missing Parts
After using our Photo to Sketch Converter Online Free, you might end up with broken sketch lines if your photo didn't have strong contrast in that area. Simply download the sketch created in the tool, upload it here to our Clone Stamp Tool, and clone the missing parts. You can even add additional lines where they are not supposed to be and create your unique sketch.
In this screen recording, you can see how to copy the outline next to the missing part, rotate it, and place it as a continuation of the outline for the lower part of the orange. You can also flip and then rotate copied parts to fill in broken lines as you wish.